Kate Bosch Professional Organizing
  • Home
  • Work with Me
  • About Me
  • Happy Clients
  • Blog
  • Free
  • Resources
  • Press
  • Let's Talk

​Get organized
​
Tips to motivate and ​​inspire you!

Sign Up for Monthly Tips

Why the Fancy Egg Bins?

9/26/2018

3 Comments

 
Picture
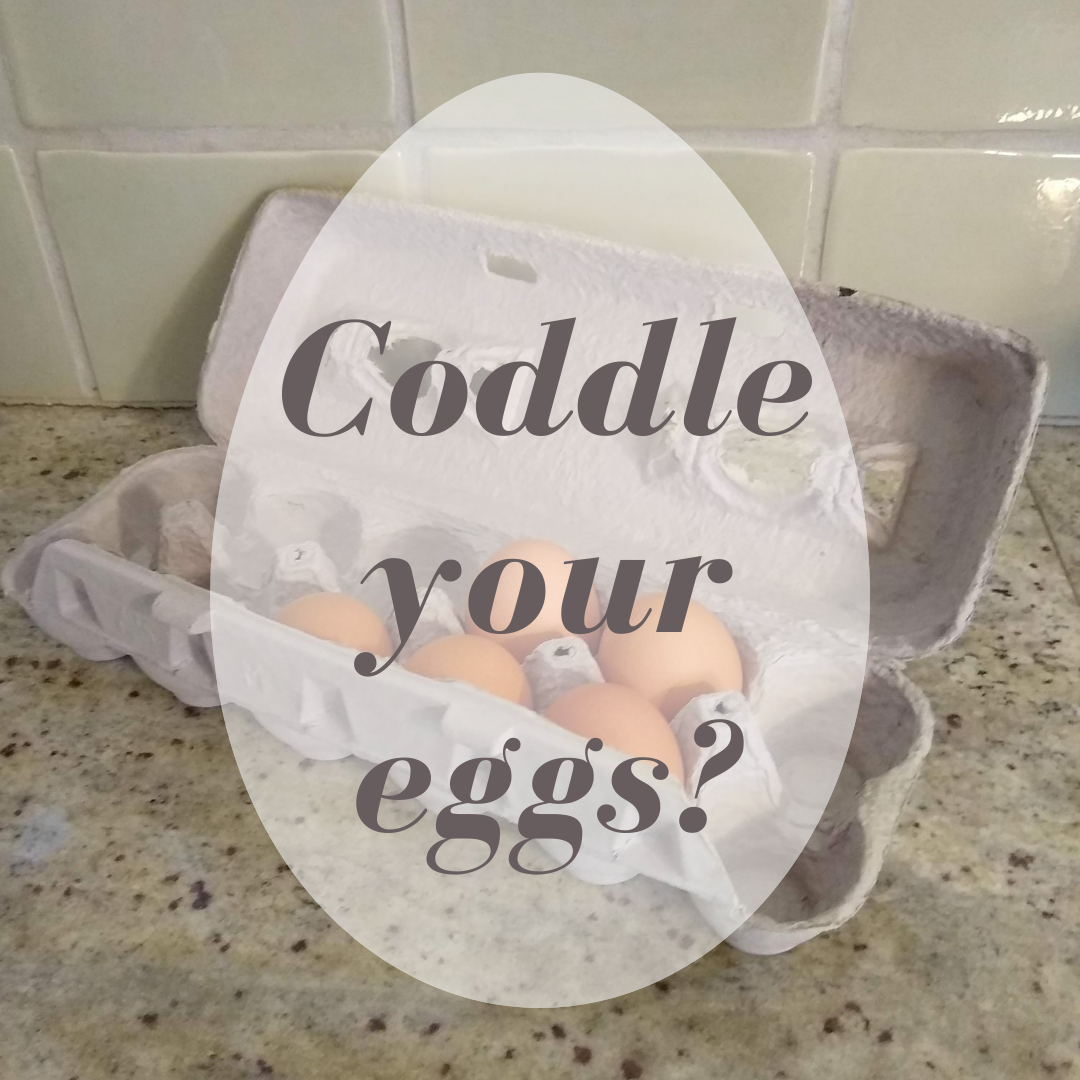
Eggs are one of the great products that come to us already nestled into perfectly organized, sturdy-yet-gentle, recyclable, reusable containers.*

So why do refrigerator companies and stores that sell organizing supplies try to convince us that we need to buy rigid plastic (non-recyclable) "egg organizer" containers into which we must transfer our already-contained eggs?

So, you get home from the grocery store and then have to transfer each little egg into a hard plastic container (careful not to break it!) just to put them into your fridge? What if you still had a few eggs left so the new dozen doesn't completely fit? Do you have to buy a second plastic egg bin?

If you do happen to crack an egg, now you have to take all the eggs out and wash the container instead of just leaving it and tossing it into the recycling bin when you're done with the other eggs.

And what about the sell-by date from the original carton? When you transfer the eggs into the fancy bin, you have no idea which eggs are the freshest and when they'll go bad. So maybe you have to take out a pencil and individually mark each egg with its freshness date.

What a waste of time!

One rule of thumb I have for organizing anything is: make it easy to maintain. Organizing should be simple and should follow your natural habits so it'll be easier for you to keep up with it.

Ok, so are we all in agreement that we don't need to transfer eggs from their cardboard supermarket containers into fancy plastic ones?

Now what do you do with that fancy egg bin you bought or that came with your refrigerator? Here are a few ideas:
  • Donate it to your child's (or a nursery school's) play kitchen.
  • Create a sorting toy for a child from it by setting out a variety of small items (buttons, coins, seeds, hardware bits, rubber bands, tiny toys). Have the child learn to sort by different criteria: size, shape, color, material, etc.
  • Use it as a snack tray to get children to try little bits of new foods.
  • Use it as a paint palette.
  • Store extra buttons in it, sorted by color or size.
  • Use it to sort hardware when putting together a piece of DIY furniture. (I use a cardboard egg carton when putting together Ikea furniture.)
  • [Insert your idea here.] Feel free to comment on this blog to share your ideas.

Even if you didn't succumb to the shopping pressure and buy a fancy egg bin, you can repurpose a plain plastic or cardboard egg carton for any of these uses.

When my children were little, I had them paint a different color in each well of a cardboard egg carton. We took the carton with us when we went for walks and hunted for little treasures along the way to match the colors they had painted. Every young child seems to go through a phase of interrupting walks by stopping to examine every single blade of grass or pebble, so this collecting activity made the walk more purposeful and enjoyable for grown-ups and children alike.

The moral of this story? Release yourself from the make-work of over-organizing things that area already perfectly well organized!


*To be fair, eggs can come in a variety of containers, not all of which are great: cardboard, styrofoam, or light plastic containers. Styrofoam is the worst as it's not recyclable and it cushions the eggs but isn't rigid enough to withstand being stacked, so you'll often find broken or cracked eggs. Light plastic is OK, but these usually have double lids (one domed to nestle the eggs, one flat to form the top) which are a pain to open. Plain old cardboard containers are my favorite for ease of recycling and ease of use.
3 Comments

A Fun and Organized Snack

8/21/2018

0 Comments

 
It's nearly back-to-school time, so be sure to check out some of my previous posts about that (like this one, this one, and this one).

In the meantime, don't forget to enjoy the last gasp of summer with fun tips like this one!

Here’s a quick and organized way to serve lunch to your kids.
Picture
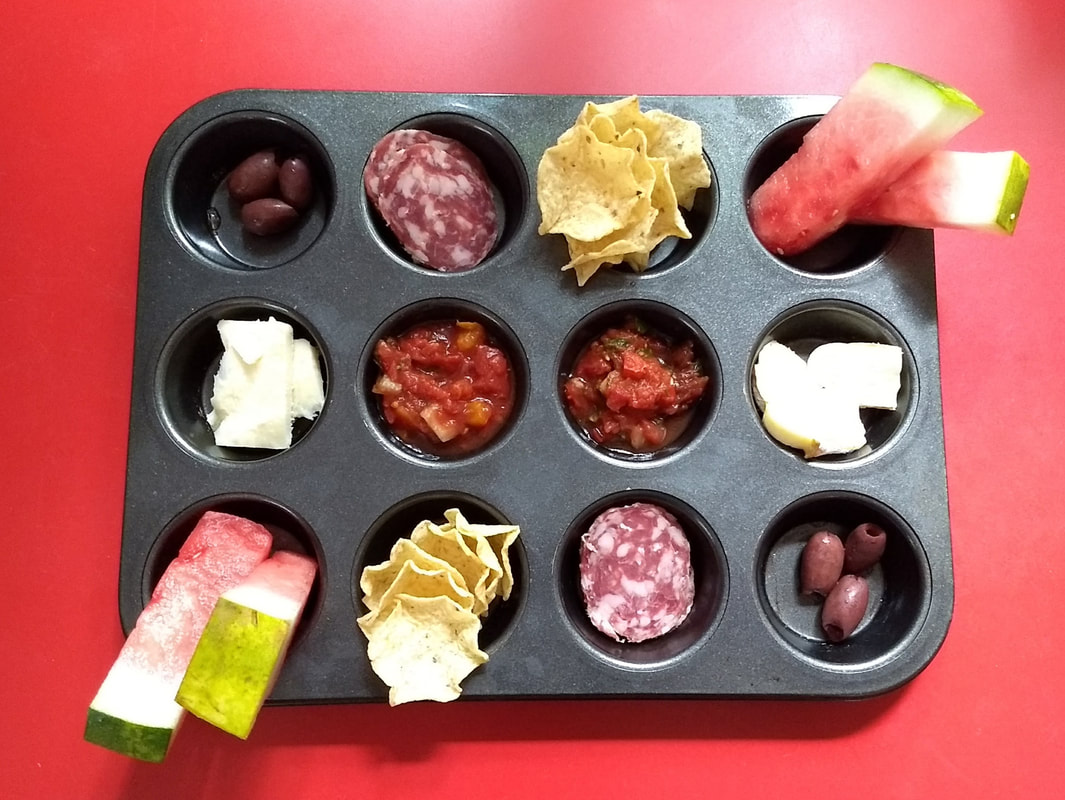
When my kids were little (and occasionally even now that they’re bigger), they loved the surprise of a muffin-tin lunch. The novelty of having several different foods in separate little compartments got them to try new things and to eat a more balanced meal.

After all, who doesn't like cute, tiny food and meals that give you a taste of everything? We grownups just call it tapas!

You can put all kinds of things in the tins, but it works best for two kids (or as a snack for 3-4, dividing the holes by row) with each child getting 6 muffin holes-worth of food.

Pictured here is a lunch of salami, tortilla chips and salsa, Kalamata olives, cheddar cheese, and watermelon spears. Other cute ideas are mini-salads, trail mix, crackers and cheese, nuts, beans, dried fruit, baby pickles, sandwich bites, whatever will fit. Even small servings of soup, pudding, or mac & cheese will work.

Let your creative juices flow and see how excited your kids will be to eat lunch!
0 Comments

Spring Clean Your Kitchen

5/22/2018

0 Comments

 
Click here to watch my segment with NBC-10's Emily Volz.
Picture
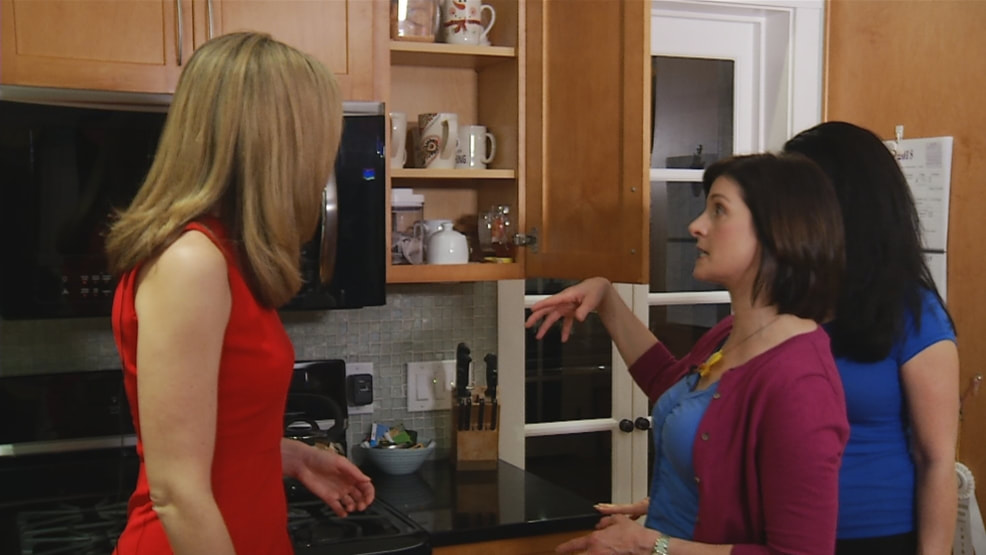
1-2-3: Now's the time to air out your kitchen and do a deep cleaning! You can either do this all at once in a one-day marathon cleaning session, or do it in pieces: fridge, freezer, pantry, and a few cabinets or drawers at a time.

1. Kitchen Cabinets and Drawers
  • Use a microfiber cloth with a mix of water and white vinegar to clean surfaces. Vinegar helps cut grease, which can build up on kitchen surfaces.
  • Wipe down the outside of the cabinets and don't forget the handles.
  • Take everything out of your cabinets and drawers and sort into categories: frequently used, sometimes used, rarely used, donate/discard.
  • While the cabinets are empty, give them a good cleaning with the microfiber cloth.
  • While the drawers are empty, use a hand vacuum to get out the crumbs and dust, then wipe them with the microfiber cloth.

2. Refrigerator and Freezer
  • Go through your refrigerator, checking foods (especially condiments) for expiration dates. Toss anything that is expired!
  • Check the freezer for foods that have expired or look like they have freezer burn. It's generally safe to eat foods with freezer burn, but they taste awful.
  • Wash refrigerator and freezer shelves and bins, either by hand or by running them through the dishwasher if they are removable.
  • Grab an empty plastic water bottle and use it as a "sentinel" to tell you that the food in your freezer is still safe to eat: Fill the water bottle half-way and set it on its side in the freezer until it freezes solid. Once frozen, set the bottle upright in the freezer. Check the bottle periodically to ensure that the water is still frozen vertically. If the water is down at the bottom of the bottle, you'll know that your freezer lost power and the water melted and refroze. If that's the case, then your frozen food did the same and is no longer safe to eat. This is great if you're in an area that loses power and you go on vacation and want to know if your freezer stayed frozen.

3. Pantry
  • Check the expiration dates on the foods in your pantry and toss anything that has expired.* Dry goods can become stale and oils can go rancid - yuck.
  • For foods that are close to their expiration date, place them near the edge of the shelf so you remember to eat those soon.
  • Vacuum and wipe pantry shelves just as you did the cabinets and drawers.
  • If you are at a loss for what to do with some of your pantry items, check recipe sites that let you search by ingredient to find ways to use up odd items.
  • If you find foods in your pantry that you're really never going to use, donate them to a local food pantry.* For me, it's usually fava beans. Every few years, I trick myself into thinking that I like fava beans so I buy them but I never seem to want to eat them!

Now enjoy cooking in your nice clean kitchen!

*Please do not attempt to donate expired food to your local shelter or food pantry as they cannot accept foods that are past the expiration date.
0 Comments

Stainless Steel Cleaning

4/17/2017

0 Comments

 
Stainless steel appliances are great looking, except when they get all those smudges and fingerprints on them. Instead of buying expensive cleaning products with harsh chemicals, try this easy recipe: mix equal parts rubbing alcohol and baby oil (mineral oil). If you can find it, try lavender scented baby oil for a lovely, fresh fragrance. Each time you use it, shake it up to mix it and then dab it onto a microfiber or other soft cloth and swipe it across your stainless steel surfaces for an instant clean!
0 Comments

Spice Up Your Day

3/20/2017

0 Comments

 
Picture
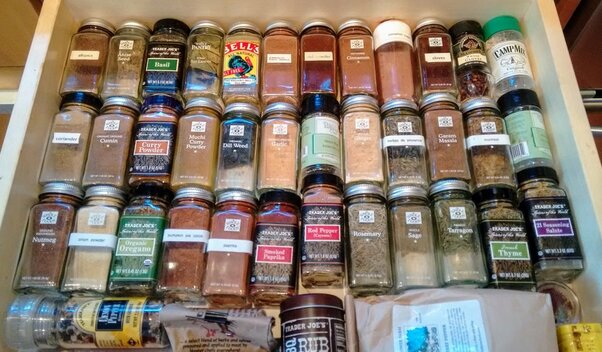
​A quick tip for keeping your spices organized: alphabetize them!
 
If you have the space, it’s great to keep spices in a shallow drawer, making it easy to line them up alphabetically so they’re a cinch to find. As you can see from the photo, I love square spice jars because they don’t roll around.
 
Don’t have a spice drawer? Try a rack that fits on the inside of a cabinet door (click here to see some). This will still keep all the spices visible (rather than when they’re stacked in a cabinet or on a lazy Susan) and also keeps them away from the heat of the stove, which leaches the flavor out of them.
 
Alternatively, if alphabetizing doesn’t make sense for the way your brain is organized, you can group spices by category. For example, make a row of baking spices (allspice, cinnamon, clove, ginger, nutmeg, etc.), a row of Italian spices (bay leaves, basil, pepper flakes, oregano, rosemary, etc.), a row of French spices (chives, dill, fennel, tarragon, thyme, etc.), and a row of your favorite go-to spices.
 
Have fun organizing your spices this week. Don’t forget to throw away any that are past their prime (Sniff them – if they have no odor, they have no flavor.) and don’t forget to use them to add extra zest to the next dish you cook!

0 Comments

Use Your Freezer to Speed Up Your Day

2/13/2017

0 Comments

 
As I was writing about freezer organization last week, I started thinking of some of the many ways you can use your freezer as a shortcut to help with meal preparation. Here are a few ideas.
 
1. A hot breakfast from your freezer: If your morning is rushed but you like a hot breakfast, create a grab-and-go breakfast area in your freezer. You can freeze oatmeal (with fruit, canned pumpkin, spices, whatever you like already added), breakfast sandwiches or burritos, and mini frittatas or quiches made in muffin tins. Reheat in the microwave for an instant hot breakfast.
 
2. If you’re a big smoothie drinker, make your own smoothie mixes (fruit, veggies, protein powder, etc.), put single-serve portions in freezer bags, and store them horizontally until they are frozen flat. Once frozen, you can store them vertically like file folders. In the morning, grab a bag, break the frozen food into chunks, pop the pieces in a blender, and add liquid for an instant smoothie.
 
3. Convenience lunch: My cousin invented this clever idea when she was a busy high school student. Take an entire loaf of bread, make pb&j (or other) sandwiches, wrap each sandwich in wax paper, put them back in the bread bag, and freeze. Pop a sandwich into your bag in the morning and it will be thawed and ready to eat by lunch. Bonus: you won’t need an ice pack to keep the rest of your lunch cool.
 
4. Dinner: Of course, you can make entire meals and freeze them or make double the amount of one meal and freeze half. But I don’t have a huge freezer to store lots of meals, so what I prefer to do is freeze foods so they are recipe-ready. I freeze meats in marinades so that when I thaw them they can go right into the oven or skillet. I blanche or pre-cook vegetables so they are ready for the next step such as mashing (mashed cauliflower = yum! Potatoes don’t freeze well.) or adding to a soup or casserole.
0 Comments

Refrigerator Organization, Part 3 - The Freezer

2/6/2017

2 Comments

 
Your freezer should be set to 0°F.
 
I once had an argument (spirited discussion?) with someone who insisted that the freezer could be set at 32°F because that’s the temperature at which water freezes. I guess that would be fine if all you stored in your freezer was ice, but the freezing point of many things is lower than 32°F, which is why my ice pops (sugar water) were still liquid in the 32°F freezer.

Even if food freezes solid at a higher temperature, keeping your freezer at 0°F slows the food’s deterioration so much that it can keep for months or even a year (though taste might suffer).

Unlike the fridge, which requires good air circulation to maintain temperature, the freezer likes to be full. All those frozen-solid foods packed together help the freezer stay at temperature more efficiently.

To get the most out of your freezer, you’ll want to create zones for different types of things.
  • Group frozen meats and entrees in a less-accessible area of the freezer because you’ll get these out as needed rather than needing easy access.
  • Put frozen vegetables and side dishes together in another area. If these are things you’ve made yourself, put them in plastic freezer bags, flatten the bag, and put it horizontally in the freezer so it freezes flat. When it’s frozen solid, you can “file” the bags vertically so they are easy to grab.
  • Put frozen desserts and ice cream together. It’s your choice whether this should be easily accessible or hard to reach. Can you resist temptation?
  • Store little items and cooking ingredients together. I freeze extra butter, tomato paste (in a bag in tablespoon-sized portions), homemade stock (freeze in ice cube trays then transfer to a bag), fresh grated ginger (stored flat in a bag so I can break off pieces as needed), and freeze-dried coffee (for recipes).
  • Odd things that are good to store in the freezer: flours (especially whole wheat), nuts, nut flours, rice, and grains. These will keep indefinitely in the freezer without going rancid and you’ll never have a problem with those icky pantry moths. Store all of these things in airtight plastic bins or bags.
  • Finally, here’s a food-safety tip. Keep a half-filled plastic water bottle in the freezer.
  • This bottle is a sentinel so that if you go away and lose power you’ll know if the food in the freezer is still safe to eat. Here’s how it works:
  1. Fill a plastic bottle half way with water.
  2. Screw the cap on tightly and place the bottle on its side in the freezer so the water freezes solidly up one side of the bottle.
  3. Once frozen, set the bottle vertically in the freezer.
  4. If the power goes out and your freezer thaws and then refreezes, you’ll know because the water will now be frozen in the bottom half of your bottle instead of up the side of the bottle.
2 Comments

Refrigerator Organization, Part 2 of 3

1/30/2017

0 Comments

 
[OK Renee, here’s the organization part that you really wanted to hear.]
 
How do you keep the fridge tidy and make it easy to find things? Follow these steps.

  1. Always start by de-cluttering: remove the excess. Do this by taking everything out of the fridge section by section, throwing out expired food or items you know you’ll never eat (condiments, unappealing leftovers), and cleaning the shelves as you go. A microfiber cloth with plain water or water and white vinegar works perfectly and won’t introduce toxic cleaners to the place where your food is stored.
  2. Group like with like. Do this in terms of both use/type of item and size, so you can arrange the shelf heights to match the items. For example, put all salad dressings and tall condiments like soy sauce together in one door shelf and put short condiments like mustard, olives, and jam or jelly together in another.
  3. As I mentioned last week, the fridge has some natural zones created by temperature variations that help you figure out where to store what. Raw meat goes on the cold bottom shelf, leftovers and ready-to-eat food goes on the consistent top shelf, produce goes in the crisper drawers (I like to use one for veggies and the other for salad greens), condiments (and butter) go on the doors. Experts say to store dairy and eggs on the bottom shelf, but I find it can get too cold (they form ice crystals) so I store these one shelf above. 
  4. Corral items into bins. Small plastic bins will help you group items in the main compartment of the fridge the same way that the small bin-style shelves on the doors do. I use these shallow drawer organizers and because they’re not deep it’s easy to see what’s in them and easy to take things out and put them away. You can use one bin for cheese, one for deli meats, one for yogurt, one for snacks, etc. The idea is to corral smaller items so they stay together and you know where they “live.” It’s also helpful to group items into zones: e.g. put all sandwich fixings in one place, breakfast items in another.
  5. Think eye level for things you want your family (or yourself) to remember to eat soon. Stuff I want my family to grab, either because it’s healthy or because I don’t want it to go to waste, I put at their eye level so it’s the first thing they see. I also use this strategy to my advantage by storing things I don’t want my husband to eat (Don’t touch my homemade chocolate truffles!) low down in the fridge. He never sees it! This works for the pantry, too.

Next week, in the third installment of the Refrigerator Organization series we’ll tackle your freezer.
0 Comments

Refrigerator Organization, Part 1

1/23/2017

0 Comments

 
​Today’s tip is a request by my friend Renee. I’m going to break it into three tips, so be sure to check back here for the next two weeks to get your fridge in tip-top shape.
 
How do you organize the refrigerator?

It’s not so different from organizing other things like desk drawers and bookshelves. The tricky part is that the contents of the fridge are always shifting as you use things up and buy new things.
 
The first aspect we’ll tackle is temperature, which guides the basic layout of the fridge.
 
Even though you set it to the recommended 35-38°F, the temperature isn’t constant or consistent throughout the fridge. Here’s the breakdown:

  • The door is the warmest part. Every food-safety expert says not to store milk here, but I still do because my kids go through it quickly and it’s the most convenient spot. We’ve never had a problem with it spoiling and I would know because I have a very sensitive nose for spoiled milk! Other than that, the door is best used for condiments, juice, and butter (doesn’t need to be kept as cold as other dairy).
  • The temperature is most consistent on the upper shelves, so this is where to store foods that don’t need to be cooked (leftovers, ready-to-eat foods, berries, etc.).
  • The lower shelf is the coldest spot. This is where you store raw meat. My husband has also claimed half of the bottom shelf for beer.
  • Crisper drawers keep produce fresher by creating a moist atmosphere. Keep fruits and veggies separate. Better yet, keep fruit in an appealing bowl on the counter or table. It doesn’t need refrigeration, looks pretty, and you’ll remember to eat it. Now that the fruit drawer is free, use one crisper drawer for vegetables and one for salad greens. 
  • The middle of the fridge is for everything else. (Check back next week for help with this.)
 
One big rule for the fridge is not to overcrowd it. The cold air needs to circulate to keep things fresh. Better to have to make another trip to the store later in the week than to have to throw out a whole bunch of spoiled food.
 
Next week, I’ll help you de-clutter the fridge and group items for convenience. Stay tuned!
0 Comments

Pre-Holiday Pantry Prep

11/14/2016

0 Comments

 
With Thanksgiving fewer than two weeks away, it's time to whip your pantry, fridge, and freezer into shape.

You'll need to make space for the holiday staples you'll stock up on, the cookies you'll freeze, and the leftovers the big meals create.

This is the perfect time to use up all those items that might be close to their expiration dates or those canned goods you bought thinking, "This might be good to have on hand."

Step 1: Quickly sort through your fridge and pantry, tossing anything that's past the expiration date. Check those condiments!

Step 2: Get creative and come up with meals based on whatever is left that you want to use up.

Sites like Allrecipes and Supercook that allow you to search for recipes based on ingredients you have can be a big help. 

For the next week or so, try to shop only for perishables (e.g. milk, eggs, vegetables) to round out the meals that you'll make with all those pantry finds.

Need help coming up with ideas? Here's my fancy-ish take on tuna noodle casserole (no noodles) that my family loves, even though my kids don't like canned tuna served any other way. It uses up canned tuna and frozen peas. As long as you keep the butter, flour, milk, and eggs the same, everything else is flexible and you can vary the ingredients and quantities to suit your needs.

Tuna Souffle
4 tablespoons butter
1/4 cup flour
1 cup milk
pinch of salt
pinch of pepper
1/2 teaspoon Herbes de Provence or other herbs that you like (dill is yummy)
4 eggs
1/2 cup grated cheese (Parmesan, cheddar, gruyere, swiss, or a combination)
2 cans of tuna (Best if packed in water, but whatever you have will work.)
about 1/2 bag of frozen peas, thawed (or canned if that's what you have)

Preheat oven to 400 degrees.

Butter a 1-quart souffle or casserole dish.

Melt the butter in a saucepan. Stir in flour and blend until smooth and cook over low heat until golden. While whisking butter and flour, add the milk all at once. Stir constantly and cook until thick. Add salt, pepper, and herbs. Remove from heat and cool for 10 minutes.

In a large bowl, beat eggs. Add cheese, tuna, and thawed peas. Stir to combine. Add cooled milk mixture and stir. Pour into buttered dish and bake 30-40 minutes until eggs are set and top is puffed and golden.

​Serve immediately. Souffle will fall a little, so don't worry about that. It's great with a simple green salad and some French bread.
0 Comments

    Categories

    All
    Bathroom
    Beauty
    Books
    Closets & Clothes
    Clutter
    Digital & Electronics
    Garage
    Holiday & Seasonal
    Housekeeping
    Kitchen & Pantry
    Moving
    Office
    Paperwork
    Pare Down
    Productivity
    Recycling & Repurposing
    Schedule
    School
    Sentimental
    Shopping
    Toys & Kids
    Travel

    Archives

    August 2022
    July 2022
    June 2022
    May 2022
    April 2022
    March 2022
    February 2022
    January 2022
    December 2021
    November 2021
    October 2021
    September 2021
    August 2021
    July 2021
    June 2021
    May 2021
    April 2021
    March 2021
    February 2021
    January 2021
    December 2020
    November 2020
    October 2020
    September 2020
    August 2020
    July 2020
    May 2020
    April 2020
    March 2020
    February 2020
    January 2020
    December 2019
    November 2019
    October 2019
    September 2019
    August 2019
    June 2019
    May 2019
    April 2019
    March 2019
    February 2019
    January 2019
    December 2018
    November 2018
    October 2018
    September 2018
    August 2018
    July 2018
    June 2018
    May 2018
    April 2018
    March 2018
    February 2018
    January 2018
    December 2017
    November 2017
    October 2017
    September 2017
    August 2017
    July 2017
    June 2017
    May 2017
    April 2017
    March 2017
    February 2017
    January 2017
    December 2016
    November 2016
    October 2016
    September 2016
    May 2016
    April 2016

    RSS Feed

Home

work with me

About Me

Happy clients

Blog

RESOURCES
PRESS
LET"S TALK
Copyright © 2022
  • Home
  • Work with Me
  • About Me
  • Happy Clients
  • Blog
  • Free
  • Resources
  • Press
  • Let's Talk