|
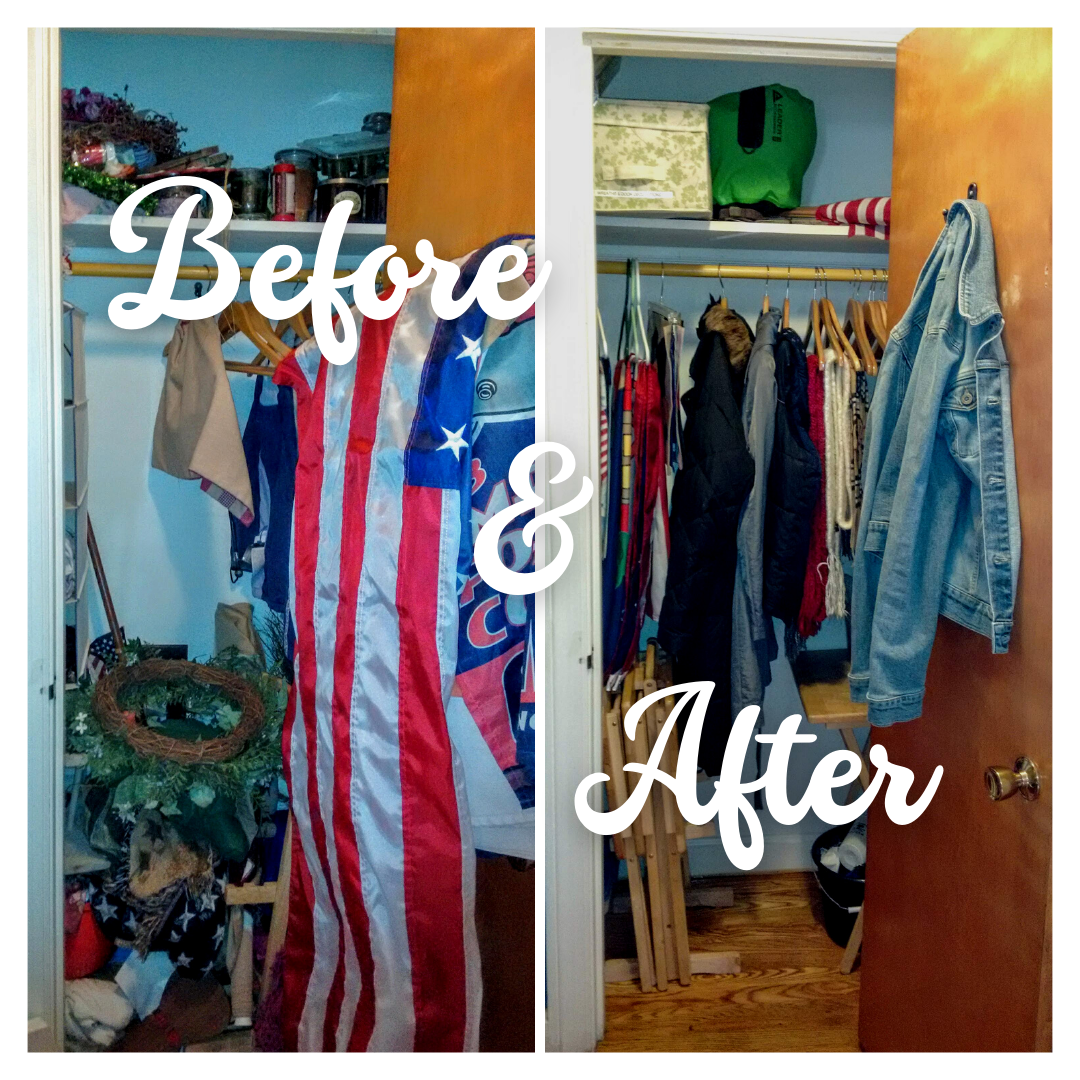
Little things make a big difference. A vase of flowers turns your kitchen table into a dining table. A couple of new throw pillows takes your old sofa from peaked to perky. Little organizing projects can have the same impact on your space, daily routine, and your feeling of calm control over your home life. You may look around your home and see so many spaces that need organizing, especially big areas such as your living room or basement. You see the forest—so overwhelming! In order to make progress, you’ll need to shift your focus and zoom in on one individual tree at a time. In Getting Organized, first published back in 1978, Stephanie Winston lays out her Organizing Principles, the second of which is to divide a complex problem into manageable segments. Instead of seeing organizing in terms of your entire home, break it down into little projects that you can chip away at one at a time. You’ll be pleasantly surprised by the progress you make! Maybe your house looks neat to the casual observer but is disorganized in the unseen spaces: closets, cupboards, and drawers. Decluttering these little spaces can make a big difference in your life. If you fight with the desk drawer every time you try to open it or have to rummage through the kitchen junk drawer in order to find your keys, you’re wasting a lot of time in your day and causing frustration that’s avoidable if only these spaces were organized. Tackling the disorder lurking below the surface will free up time and energy! In order to identify your small organizing projects, make a list of spaces that are troublesome to you. These could be the most visible spaces and the ones you access most frequently, or they could be neglected spaces that nag at your subconscious. Now, break the list down into subcategories. For example, say you have a messy mudroom entryway. You may not have the time, energy, or inclination to organize the whole space, so break it down into mini-organizing projects: drawers, hooks, and cubbies. Or divide your projects by item category: shoes/boots, accessories, and coats. Take this further and sort your list by the time you think each project will take. This way, if you have some extra time in your day, be it 5 minutes or 20 minutes, you can identify which project you can complete in that time. When tackling any organizing project, whether it’s a whole room or a tiny drawer, the first step is to identify the purpose of the space. What is your goal? What should be stored there? How often do you use that space? The answers to these questions will inform what needs to be stored there. My blog about organizing my electronics drawer is a good example of identifying a purpose for a space. Next, dig in and empty the entire space! Yes, this makes a big mess, but it also forces you to complete the project because you have to clean everything up and put it away in order to use the space again. Once everything is out and all over the floor or a nearby table, sort items into categories. Identify items that don’t belong in that space because they don’t fit your goal for the space. Don’t take time to try to put these away now, just make a “Go Elsewhere” pile. You should also set aside items that you don’t need but are still useful (make a donate pile) and items that will go back into the space once it’s organized. Move out any trash or recyclables too. Now, look at the pile of items that should go back into the space. See if you can group these into categories. In my daughter’s craft supply drawer, it’s easiest to sort by activity. Some of the categories are poster making, card making, and drawing. Your categories might be based on activity, family member (mom, dad, kids), or type of item (novels, nonfiction, how-to books). This is also the time to get rid of duplicates and to reconsider what you might be able to part with and donate. Once you know your categories, you can see how they should fit back into the space. Organizing principles to keep in mind are: ● Allot more space to categories with more items. ● Contain items in bins or boxes as needed to keep them together. ● Keep your most frequently used items and categories in the most easily accessible location. To keep yourself honest and to make your organizing system transparent to everyone in your household, label the spaces and categories. You can use a label maker if you have one, clip-on labels, adhesive labels, or just make a label with a permanent marker, paper, and tape. Give your categories titles that make the most sense to you. When things are labeled, everyone will be able to maintain the organization. Whether you have many small-space organizing projects or have lots of big spaces that need help, you can break your organizing work into small chunks to fit your schedule and attention span. Do yourself a favor and schedule a regular date with yourself to organize. Whether you prefer 5-15 minutes a day or ½ hour every couple of days, stick with it, and you will see progress. What is one small organizing project you can tackle this week? What kind of difference will it make in your daily life? How will successfully completing this project make you feel? Before-and-after photos are a great way to sustain your motivation to get and stay organized. Go around your house and snap some photos of spaces that you’d like to improve. As you tackle projects, photograph your work so you have a record of your progress and can see just how far you’ve come.
One client of mine was so thrilled with how far she has come in organizing her home—and, as a side effect, organizing her life—that she made a photo book of her organizing journey. Use your photos to celebrate your success! Read more client experiences on my Happy Clients page. If you're ready to have your own happy organizing experience, let's start by scheduling your complimentary consultation.
0 Comments
Your comment will be posted after it is approved.
Leave a Reply. |
Categories
All
Archives
July 2024
|
|
Copyright © 2024 Kate Bosch Professional Organizing LLC
|
Providence, Rhode Island | 401-699-4878
|


 RSS Feed